
티스토리 뷰
1. ami-40d28157 를 사용해 EC2 Instance를 생성하고 싶다. 추가적인 설정 없이 Instance의 이름만 내가 원하는 것으로 지정하고 싶을 때 어떻게 해야할까?
resource "aws_instance" "example" {
    ami = "ami-40d28157"
    instance_type = "t2.micro"

    tags = {
    	Name = "terraform-example"
    }
}
Point!!!
1. instance_type의 t2.micro는 AWS 프리티어에 해당하는 타입이다. (당장은 이것만 쓸듯)
2. tags 뒤에는 반드시 = 기호를 사용해야 한다. (책에선 안되있는데 이상하네..ㅠㅠ)

2. ami-40d28157 를 사용해 EC2 Instance를 생성하고 거기에 Web Server를 올리고싶을 때 어떻게 해야할까?
resource "aws_security_group" "instance" {
    name = "ch4njun-example-instance"

    ingress {
        from_port = 8080
        to_port = 8080
        protocol = "tcp"
        cidr_blocks = ["0.0.0.0/0"]
    }
}

resource "aws_instance" "example" {
    ami = "ami-40d28157"
    instance_type = "t2.micro"
    vpc_security_group_ids = ["${aws_security_group.instance.id}"]

    user_data = <<-EOF
                #!/bin/bash
                echo "Hello, World" > index.html
                nohup busybox httpd -f -p 8080 &
                EOF
    tags = {
        Name = "ch4njun-example1"
    }
}
Point!!!
1. EC2 Instance에는 기본적으로 모든 Inbound가 막히게 되어있다.
따라서 보안 그룹를 통해 외부에서 8080포트로 접근할 수 있는 규칙을 설정해줘야 한다.
2. 8080 포트로 하는 이유는 80 포트의 경우 root 권한이 필요하다.
이럴 경우 공격자에 의해 침투당했을 때 서버전체가 장악당할 수 있다.
3. cidr_blocks는 IP주소 대역을 간략하게 표현하는 방법이다. (IP/Prefix 형태로)
4. vpc_security_group_ids 설정에 값을 넣을 때 ${TYPE.NAME.ATTRIBUTE} 형태를 꼭 기억하자.
5. user_data는 해당 Instance 기동 시 수행할 내용을 적으면 된다.
<<-EOF 와 EOF 표시는 새로운 줄에 문자를 매번 추가하는 것이 아니라 단락으로 처리하는
테라폼의 히어닥(heredoc) 문법이다.
6. nohup busybox를 사용해 간단한 웹 서버를 구동시킨다.


3. ami-40d28157 를 사용해 EC2 Instance를 생성하고 거기에 Web Server를 올리는데, 여러가지 위험성을 대비해 ELB(Elastic Load Balancing)을 사용해 로드밸런싱을 진행하고 싶다. 어떻게 해야할까?
output "public_ip" {
    value = "${aws_instance.example.public_ip}"
}

output "elb_dns_name" {
    value = "${aws_elb.example.dns_name}"
}

variable "server_port" {
    description = "The port the server will use for HTTP requests"
    default = "8080"
}

data "aws_availability_zones" "all" {}

resource "aws_security_group" "elb" {
    name = "ch4njun-example-elb"

    ingress {
        from_port = 80
        to_port = 80
        protocol = "tcp"
        cidr_blocks = ["0.0.0.0/0"]
    }

    egress {
        from_port = 0
        to_port = 0
        protocol = "-1"
        cidr_blocks = ["0.0.0.0/0"]
    }
}

resource "aws_security_group" "instance" {
    name = "ch4njun-example-instance"

    ingress {
        from_port = "${var.server_port}"
        to_port = "${var.server_port}"
        protocol = "tcp"
        cidr_blocks = ["0.0.0.0/0"]
    }

    lifecycle {
        create_before_destroy = true
    }
}

resource "aws_launch_configuration" "example" {
    image_id = "ami-40d28157"
    instance_type = "t2.micro"
    security_groups = ["${aws_security_group.instance.id}"]

    user_data = <<-EOF
                #!/bin/bash
                echo "Hello, World" > index.html
                nohup busybox httpd -f -p "${var.server_port}" &
                EOF

    lifecycle {
        create_before_destroy = true
    }
}

resource "aws_elb" "example" {
    name = "terraform-asg-example"
    availability_zones = "${data.aws_availability_zones.all.names}"
    security_groups = ["${aws_security_group.elb.id}"]

    listener {
        lb_port = 80
        lb_protocol = "http"
        instance_port = "${var.server_port}"
        instance_protocol = "http"
    }

    health_check {
        healthy_threshold = 2
        unhealthy_threshold = 2
        timeout = 3
        interval = 30
        target = "HTTP:${var.server_port}/"
    }
}

resource "aws_autoscaling_group" "example" {
    launch_configuration = "${aws_launch_configuration.example.id}"
    availability_zones = "${data.aws_availability_zones.all.names}"

    load_balancers = ["${aws_elb.example.name}"]
    health_check_type = "ELB"

    min_size = "2"
    max_size = "10"

    tag {
        key = "Name"
        value = "ch4njun-asg-example"
        propagate_at_launch = true
    }
}
Point!!!
1. "data_availability_zones"는 Auto Scailing을 통해 생성되는 EC2 Instance들을 어느 가용영역에
배치할지 정하는 설정이다. 직접 ["us-east-la", "us-east-lb"] 와 같이 정의할 수 있지만
data "aws_availability_zones" "all" {} 와 같이 모든 가용영역을 가져오도록 설정했다.
2. "aws_launch_configuration"은 Auto Scailing Group(ASG)에 생성할 Instance들을 정의하게 된다.
이 때 lifesycle 을 설정하게 되는데 이는 관련된 모든 리소스에 설정해줘야 한다. (보안그룹)
3. ELB에는 availability_zones와 security_groups를 설정하고 listener를 통해 외부에서 ELB로 붙을 수
있는 포인트를 정의한다. 그리고 health_check를 통해 ELB가 ASG에 있는 EC2 Instance들이 정상적으로
동작하고 있는지 판단할 수 있도록 한다. (200/OK가 돌아오면 정상적인 것으로 판단한다.)
4. aws_autoscaling_group을 통해 ASG를 생성하는데 이 부분은 코드보면 이해가 될 것이다.
5. ASG는 EC2 Instance들을 여러 개 묶어주는 역할, ELB는 ASG에 로드밸런싱을 적용해주는 역할이다.


이 사진에서 ASG에 의해 2개의 EC2 Instance가 생성된 것을 확인할 수 있다.

이 사진에서 ELB가 생성되었고 DNS이름이 나온 것을 확인할 수 있다. 이 DNS로 접속하면 ELB를 거쳐 로드밸런싱이 적용되어 ASG에 포함된 EC2 Instance중 하나에게 패킷이 전달된다.

4. 웹 서버 클러스터와 아마존 AWS RDS MySQL과 연동시키려면 어떻게해야 하는가?
variable "db_password" {
    description = "The password for the database"
}

output "address" {
    value = "${aws_db_instance.example.address}"
}

output "port" {
    value = "${aws_db_instance.example.port}"
}

resource "aws_db_instance" "example" {
    engine = "mysql"
    allocated_storage = 10
    instance_class = "db.t2.micro"
    name = "example_database"
    username = "admin"
    password = "${var.db_password}"
}

5. aws_launch_configuration의 user_data 매개변수를 인라인으로 작성하는 것이 아니라 외부 파일(쉘 스크립트)로 만들고 싶다면 어떻게 해야할까?

data "terraform_remote_state" "db" {
    backend = "s3"

    config {
        bucket = "(생성한 버킷이름)"
        key = "2/terraform.tfstate"
        region = "us-east-1"
    }
}

data "template_file" "user_data" {
    template = "${file("user-data.sh")}"

    vars {
        server_port = "${var.server_port}"
        db_address = "${data.terraform_remote_state.db.address}"
        db_port = "${data.terraform_remote_state.db.port}"
    }
}

resource "aws_launch_configuration" "example" {
    image_id = "ami-40d28157"
    instance_type = "t2.micro"
    security_groups = ["${aws_security_group.instance.id}"]

    user_data = "${data.template_file.user_data.rendered}"

    lifecycle {
        create_before_destroy = true
    }
}
Point!!!
1. user_data = "${data.template_file.user_data.rendered}" 에서와 처럼 랜더링을 통해
변수를 채울 수 있다.
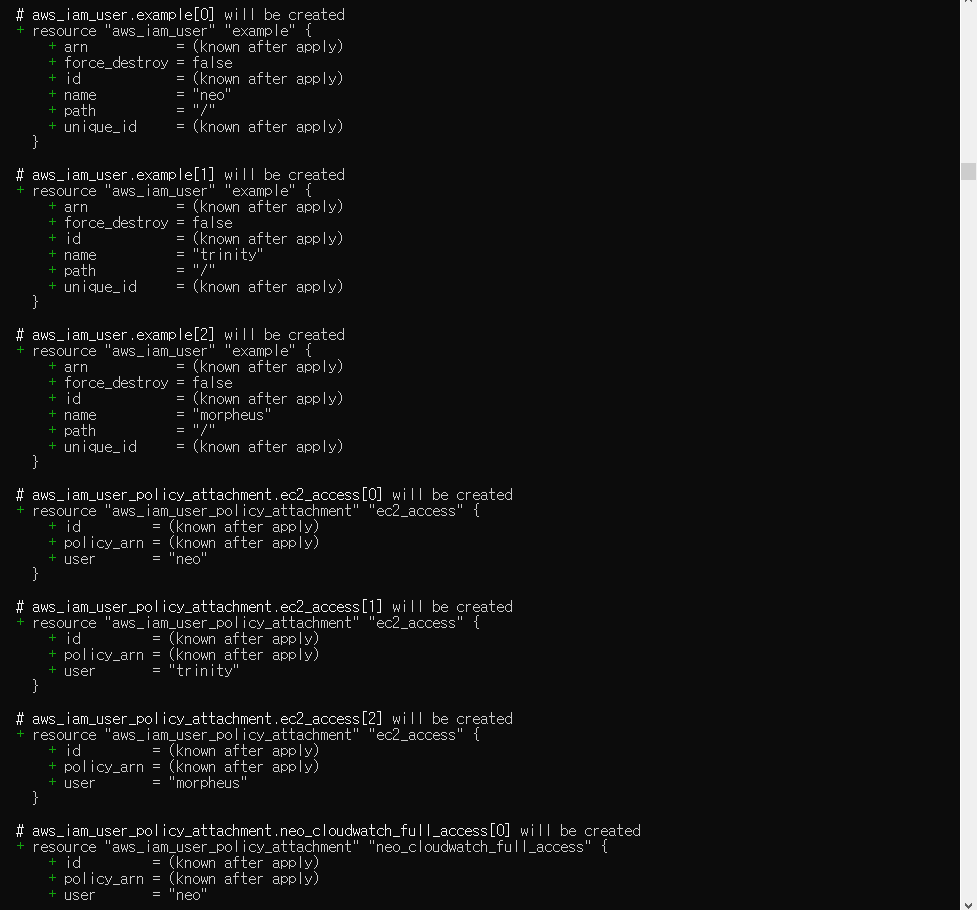
6. AWS Cloud상에 IAM User를 여러명 만들고 싶다. 물론 여러 resource문을 반복해서 작성해도 되지만 반복문을 통해 해결하려면 어떻게 해야 할까?
resource "aws_iam_user" "example" {
    count = 3
    name = "toda.${count.index}"
}
Point!!!
1. 대부분의 테라폼 리소스는 메타 변수로 count를 가지고 있고, 이 변수는 생성할 리소스에 대한
복사본 수(반복문)를 정의한다.
7. 6번 예제에서 처럼 동일한 이름에 숫자만 붙이는게 아니라 아예 다른 이름으로 IAM User를 생성하고 싶다면 어떻게 해야할까?
variable "user_names" {
    description = "Create IAM users with these names"
    type = "list"
    default = ["neo", "trinity", "morpheus"]
}

resource "aws_iam_user" "example" {
    count = "${length(var.user_names)}"
    name = "${element(var.user_names, count.index)}"
}

output "neo_arn" {
    value = "${aws_iam_user.example.0.arn}"
}

output "all_arn" {
    value = "${aws_iam_user.example.*.arn}"
}

Point!!!
1. variable로 리스트를 생성해 처리할 수 있다.
2. length(), element() 함수를 활용해서 리스트의 값을 하나씩 가져올 수 있다.
3. 리소스에 대해서 count를 사용하면 리소스가 아니라 리소스 목록이 되는 것이다. 그렇기 때문에
aws_iam_user.example은 리소스 목록이 되며 aws_iam_user.axample.[Index] 와 같이 항목에 접근
할 수 있다.
4. 리소스 목록의 모든 항목을 가져오고자 한다면 Index 자리에 '*'를 사용하면 된다.
이때 리소스 목록이 반환되기 때문에 반드시 [ ]로 감싸줘야 한다.
8. IAM 정책을 정의하고 IAM User에게 첨부하고 싶다. 그러나 IAM User 생성을 반복문을 통해 하고 있다. 이럴경우 어떻게 모든 IAM User에게 IAM 정책을 첨부할 수 있을까?
variable "user_names" {
    description = "Create IAM users with these names"
    type = "list"
    default = ["neo", "trinity", "morpheus"]
}

data "aws_iam_policy_document" "ec2_read_only" {
    statement {
        effect = "Allow"
        actions = ["ec2:Describe"]
        resources = ["*"]
    }
}

resource "aws_iam_policy" "ec2_read_only" {
    name = "ec2-read-only"
    policy = "${data.aws_iam_policy_document.ec2_read_only.json}"
}

resource "aws_iam_user_policy_attachment" "ec2_access" {
        count = "${length(var.user_names)}"
        user = "${element(var.user_names, count.index)}"
        policy_arn = "${aws_iam_policy.ec2_read_only.arn}"
}

resource "aws_iam_user" "example" {
    count = "${length(var.user_names)}"
    name = "${element(var.user_names, count.index)}"
}

Point!!!
1. aws_iam_policy_document는 IAM 정책을 정의하는 데이터다. IAM 정책은 하나 이상의 문장(Statement)
로 구성되며, 허용 혹은 거부와 같은 효과(Effect)를 지정하고, 하나 이상의 실행(Action)과
하나 이상의 리소스를 포함한다. JSON으로 IAM 정책을 정의할 수 있지만 테라폼은 같은 IAM 정책을
정의할 수 있도록 데이터 소스를 제공한다.
2. aws_iam_policy 리소스를 사용해 정책을 만든다.
3. 만들어진 정책을 IAM User에 첨부하기 위해 aws_iam_user_policy_attachment 리소스를 사용한다.
이 때 count를 사용하면 반복문을 사용해 모든 IAM User에게 정책을 첨부할 수 있다.
9. IF문을 활용해 내가 입력에 True를 입력할 때만 리소스를 생성하게 하고 싶다면 어떻게 해야할까?
variable "enable_autoscaling" {
    description = "If set to true, enable auto scaling"
}

resource "aws_autoscaling_schedule" "scale_out_during_business_hours" {
    count = "${var.enable_autoscaling}"

    scheduled_action_name = "scale-out-during-business-hours"
    min_size = 2
    max_size = 10
    desired_capacity = 10
    recurrence = "0 9 * * *"
    autoscaling_group_name = "${aws_autoscaling_group.example.name}"
}
Point!!!
1. 테라폼은 선언형 언어이기 때문에 if문을 지원하지 않는다. 때문에 count를 활용해 if문을
구현하게 되는데 enable_autoscaling 값이 count로 들어가게 되고 count가 0이면 리소스를
생성하지 않고, 1이면 리소스를 1개 생성하게 되는 원리를 이용한다.
2. 참고로 3항연산자를 하는방법이 있는데 그거는 바로밑에서 소개한다.
count = "${var.enable_autoscaling ? 1 : 0}" 이와같이 사용하면 된다.
복잡하게 사용하면 아래처럼도 사용할 수 있다.
count = "${format("%.1s", var.instance_type) == "t" ? 1 : 0}"
10. AWS CloudWatch 알람 세트를 웹 서버 클러스터 모듈의 일부로 만들고 싶다. 특정 측정 항목이 미리 정의된 기준을 초과하면 다양한 메커니즘을 통해 알림을 보내도록 CloudWatch 알람을 구성할 수 있다. CPU 사용량이 5분 동안 평균 90%이상이 되었을 때, CPU 크레딧이 낮을 때 울리는 알람을 추가하고 싶다면 어떻게해야 할까? 단, CPU 크레딧이 적용되는 t계열의 인스턴스에만 반응하도록 조건을 설정해서 구현해야한다.
resource "aws_cloudwatch_metric_alarm" "high_cpu_utilization" {
    alarm_name = "${var.cluster_name}-high-cpu-utilization"
    namespace = "AWS/EC2"
    metric_name = "CPUUtilization"

    dimensions = {
        AutoScalingGroupName = "${aws_autoscaling_group.example.name}"
    }

    comparison_operator = "GreaterThanThreshold"
    evaluation_periods = 1
    period = 300
    statistic = "Average"
    threshold = 90
    unit = "Percent"
}

resource "aws_cloudwatch_metric_alarm" "low_cpu_credit_balance" {
    count = "${format("%.1s", var.instance_type) == "t" ? 1 : 0}"

    alarm_name = "${var.cluster_name}-low-cpu-credit-balance"
    namespace = "AWS/EC2"
    metric_name = "CPUCreditBalance"

    dimensions = {
        AutoScalingGroupName = "${aws_autoscaling_group.example.name}"
    }

    comparison_operator = "LessThanThreshold"
    evaluation_periods = 1
    period = 300
    statistic = "Minimum"
    threshold = 10
    unit = "Count"
}
Point!!!
1. 가장 중요한 조건문 "${format("%.1s", var.instance_type) == "t" ? 1 : 0}" 을 보면, format()함수를
사용해서 var.instance_type의 첫 글자를 추출해낸다. 그리고 ==를 통해 문자열 비교를 수행한다.
(이런 내장함수들은 어디서봐야할까..? Docs를 살펴보자)
11. IAM User에 CloudWatch에 대한 IAM 정책을 첨부하고 싶다. 그러나 내가 Read Only 정책을 부여할지, Full Access 정책을 부여할지 Input을 통해 IF/ELSE 로 결정하고 싶을 때 어떻게 해야할까?
variable "give_neo_cloudwatch_full_access" {
    description = "If true, neo gets full access to CloudWatch"
}

variable "user_names" {
    description = "Create IAM users with these names"
    type = "list"
    default = ["neo", "trinity", "morpheus"]
}

data "aws_iam_policy_document" "cloudwatch_full_access" {
    statement {
        effect = "Allow"
        actions = ["cloudwatch:*"]
        resources = ["*"]
    }
}

data "aws_iam_policy_document" "cloudwatch_read_only" {
    statement {
        effect = "Allow"
        actions = ["cloudwatch:Describe*", "cloudwatch:Get*", "cloudwatch:List*"]
        resources = ["*"]
    }
}

resource "aws_iam_policy" "cloudwatch_full_access" {
    name = "cloudwatch-full-access"
    policy = data.aws_iam_policy_document.cloudwatch_full_access.json
}

resource "aws_iam_policy" "cloudwatch_read_only" {
    name = "cloudwatch-read-only"
    policy = "${data.aws_iam_policy_document.cloudwatch_read_only.json}"
}

resource "aws_iam_user_policy_attachment" "ec2_access" {
    count = "${length(var.user_names)}"
    user = "${element(var.user_names, count.index)}"
    policy_arn = "${aws_iam_policy.ec2_read_only.arn}"
}

resource "aws_iam_user_policy_attachment" "neo_cloudwatch_full_access" {
    count = var.give_neo_cloudwatch_full_access
    user = aws_iam_user.example.0.name
    policy_arn = aws_iam_policy.cloudwatch_full_access.arn
}

resource "aws_iam_user_policy_attachment" "neo_cloudwatch_read_only" {
    count = 1 - var.give_neo_cloudwatch_full_access
    user = aws_iam_user.example.0.name
    policy_arn = aws_iam_policy.cloudwatch_read_only.arn
}

resource "aws_iam_user" "example" {
    count = "${length(var.user_names)}"
    name = "${element(var.user_names, count.index)}"
}
이건 내가 0을 입력해서 Read Only IAM 정책이 첨부된 결과이다.
이건 내가 1을 입력해서 Full Access IAM 정책이 첨부된 결과이다.
Point!!!
1. 자세히 보면 var.give_neo_cloudwatch_full_access 와 같이 "${}" 표현을 사용하지 않은게 보이는데,
이는 테라폼 0.12 버전에 새로 추가된 기능이다. (매우편리..)
2. IF/ELSE문을 별도의 문법없이 구현할 수 있는 매우 간단한 방법이다.
'Cloud > Terraform' 카테고리의 다른 글
| [Cloud AWS] Terraform을 사용한 인프라 구성1 (0) | 2021.02.01 |
|---|---|
| [Cloud AWS] Terraform Import 활용하기 (0) | 2020.09.23 |
| [Cloud AWS] Terraform AWS S3에 terraform.tfstate 저장하기 (Remote State Storage) (0) | 2020.09.15 |
| [Cloud AWS] Terraform 입력/출력 변수 선언 (0) | 2020.09.10 |
| [Cloud AWS] Terraform 시작하기 (0) | 2020.09.07 |